This article details the safest and most efficient aquarium cycling methods, and highlights some common cycling issues. If you’re not sure what cycling means, please read this article first: Introduction to the Nitrogen Cycle (Or, Why You Killed That Goldfish When You Were Little).
Seeded media method
This is the easiest, fastest and safest cycling method. “Seeded” filter media is any porous material that has been previously used in someone’s filter and still contains active nitrifying bacteria.
Step 1: Obtain the bacteria
If you have an established aquarium and are trying to set up a new one, simply transfer some of the biological media from that filter to your new one. Otherwise, you can ask a friend or your local fish store to give you some of their used filter media. (If you’re in the area, come see me and I will give you some of mine!) Once the media is in place, simply start your filter and let the bacteria do their work.
Step 2: Feed the bacteria
To keep the bacteria alive in your filter, you will need to provide them with a source of ammonia. Follow the ammonia or live-in methods from this point on. Note that the live-in method will be stressful for your animals. Using seeded media shortens the cycling process, but it could still take anywhere from a few days to a few weeks.
Ammonia method
This is the method I recommend if you have a brand new aquarium with no living animals in it. You can buy small amounts of pure ammonia from my shop, or find some in the cleaning section of most hardware stores. Some people prefer to let fish flakes or a raw shrimp decompose in their aquarium to create a source of ammonia, but this makes the process a lot slower and can introduce harmful pathogens to your tank. It’s also unreliable, as the amount of ammonia produced this way is extremely variable. Using pure ammonia allows you to control the exact concentration of ammonia that ends up in your tank.
Step 1: Obtain the bacteria
Aside from ammonia, you will need a source of bacteria. You could take your chances and wait for them to occur naturally in the water, but using bottled bacteria will speed things up considerably. You can obtain some from my shop or any pet store that sells fish. Any brand of bottled nitrifying bacteria will work. Pour them into the water and they will cling to whatever surface they find. The more porous surface they have to inhabit, the better. The vast majority will end up inside your filter, as they require a lot of oxygen to thrive. So make sure you have porous material in there, and always keep the filter running!
Step 2: Feed the bacteria
You’ll want to start with an ammonia concentration of 2 to 4 ppm. To get to this concentration, add 2 to 4 mL of pure ammonia per L of aquarium water (~1/2 Tbsp to 1Tbsp per gallon). This single dose should be enough to keep your bacteria fed for the entire duration of the cycling process.
Step 3: Monitor the parameters
Follow the instructions in the monitoring section, starting from step 2.
Emergency live-in cycling
If you already have animals in your aquarium and you’re unable to relocate them to a different, well-established tank while their current tank cycles, you may need to do an emergency live-in cycling. It will be stressful for your animals, but with careful monitoring and quick interventions, you can prevent chemical burns and secondary illnesses.
Step 1: Obtain the bacteria
Ideally, you’ll want to use seeded media for this, as it truly is the quickest and safest way to get your bacteria established. If that’s not an option, I highly recommend getting your hands on a bottle of Tetra SafeStart. This is, in my experience, the fastest and safest product on the market. Unfortunately it is nearly impossible to find in Canada. I would definitely carry it in the store if I could find a supplier!
If you do manage to get your hands on a bottle of TSS, you’ll want to do a big water change, then dump the entire contents of the bottle into your tank and leave it alone for two weeks. Note that you won’t be able to use conditioner during that time, as it interferes with TSS’s mechanism, according to Tetra. You’re not supposed to do water changes either, but obviously if your animals show signs of distress, you’re allowed to bend the rules a little. Just try to keep it to a minimum (you can do spot cleanings with a turkey baster, and refill to counter evaporative loss). Aside from that, just cross your fingers and wait.
If you can’t find TSS, just use any brand of bottled nitrifying bacteria. You can still keep your animals safe — it’s just going to be more work.
Step 2: Feed the bacteria
Your animals will take care of this step for you. Moving on!
Step 3: Monitor the parameters
If you’re using Tetra SafeStart:
Every two days or so, test the water for nitrites. If you detect 2.0 ppm of nitrites or more, do a 50% water change to prevent stalling (see the troubleshooting section for details). Make sure to use dechlorinated water — remember, you’re not allowed to use conditioner!
After two weeks, test the water for ammonia, nitrites and nitrates. If you detect no ammonia or nitrites, but nitrates are 40 ppm or more, congratulations! Your aquarium is cycled. Do a final water change and you’re done.
If you’re still getting ammonia or nitrites, start doing 50% water changes and adding conditioner once a day. You will need to do this until the tank is fully cycled — yes, it’s a pain, but it’s the only way to keep your animals safe! Start monitoring your cycle as described in step 3 of the monitoring section below.
If you’re using a different product:
Start doing 50% water changes and adding conditioner once a day. You will need to do this until the tank is fully cycled — yes, it’s a pain, but it will keep your animals safe!
Follow the instructions in the monitoring section below, starting from step 1.
Monitoring the cycle
Most guides have you testing ammonia, nitrites and nitrates with liquid test kits every single day until the aquarium is fully cycled. That is a lot of work! Here is what I recommend instead:
Step 1: Ammonia
Test for ammonia once a day until you get a reading of 0.25 ppm or more. Then, move onto step 2.
Step 2: Nitrites
Test for nitrites once a day until you get a reading of 0.5 ppm or above. Then, move onto step 3.
Note: if nitrites shoot up to 2.0 ppm or above, add conditioner. This will help prevent your cycle from stalling (more details in the troubleshooting section).
If you don’t record any nitrites for two weeks, consult the troubleshooting section.
Step 3: Nitrates
Test for nitrates once a day until you get a reading of 40 ppm or above, then test ammonia and nitrites. If they are both at zero, congratulations! Your aquarium is fully cycled. Do one last water change and you will be good to go.
If you’re getting 40 ppm nitrates or more, but are still registering ammonia, consult the troubleshooting section.
If ammonia is at zero but you are still getting some nitrites, you probably just need to wait a bit longer. Give it a couple days and test again.
Cycle troubleshooting
Problem 1: You’re not getting the first ammonia spike (all parameters are at zero)
You didn’t add enough ammonia to start the cycle. Are you trying to cycle your tank with fish flakes, raw shrimp or using animals who don’t produce much waste (e.g. snails)? Don’t do that. Use one of the methods described above, you’ll have a much easier time.
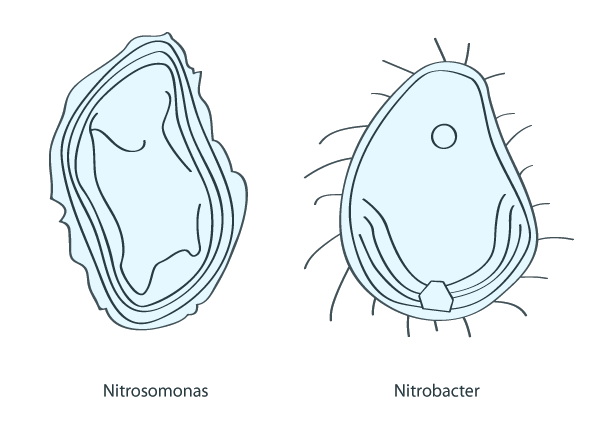
Problem 2: Ammonia is not converting into nitrites (high ammonia, no nitrites, no nitrates)
You don’t have enough nitrifying bacteria in the water. Add bottled bacteria, that will kick-start the process. Make sure your filter is equipped with biological media so they will have a space to colonize, and don’t forget to keep your filter running at all times.
Problem 3: Your cycle is stalled at the nitrite stage (little to no ammonia, high nitrites, no nitrates)
Your nitrites are too high. To avoid a bacterial die-off, you should be keeping the levels below 4 ppm. You can control the amount of nitrites by doing water changes (don’t forget to add conditioner!) A 50% water change will cut the amount of nitrites by half. If that’s still too high, do another 50% water change to cut that amount by half again. Don’t just change all the water at once, though — you want to keep some nitrites in the tank so that your nitrobacters don’t starve.
If you worry about water changes removing too much ammonia from your tank, you can use Seachem Prime to neutralize the excess nitrites instead. One dose will neutralize 0.5 ppm of nitrites for 24 hours. You can safely use up to 4 doses, even if there are live animals in the tank. Try to keep some nitrites for your nitrobacters to munch on, though! You don’t need to neutralize all of it, just enough so that it doesn’t reach 4 ppm. I recommend trying to stay below 2 ppm, just to be safe.
Problem 4: The cycle never seems to end (low ammonia, low nitrites, high nitrates)
You don’t have enough filtration capacity for the amount of ammonia that is being produced in your tank. Perhaps you are overstocking, are not using enough biological media, or your filter is inadequate.
Problem 5: Your cycle suddenly crashed (high ammonia, little to no nitrites, low to high nitrates)
Something killed off your nitrifying bacteria. Maybe your filter stopped running for too long (e.g. during a power outage). Maybe you forgot to dechlorinate the water. Maybe you treated your tank with an antibiotic. Whatever it is, you will need to restart the cycling process. If you’re lucky, some of the bacteria survived the ordeal. Follow the steps for live-in cycling and hope for a quick recovery!