Posted on

Filtration Basics

There are many models of filter, but they all rely on the same principles. There are three types of filtration: mechanical, chemical and biological. Understanding what these do will help you choose the right filter, save money on expensive filter media, and keep your aquatic pets safe from new tank syndrome.

Mechanical filtration
Most filter models rely on some type of mechanical filtration. Mechanical filtration is the process of physically trapping debris that are floating in the water, so that you can remove it by hand. This is done by forcing the water through an absorbant, porous material such as a sponge, filter pad or floss. Any particles too big to fit through the pores will stick to the material, which will eventually clog and need to be rinsed out or replaced.

Materials will large pores will last longer without clogging, but will let many small particles through. We often refer to those materials as pre-filters, because they are typically used as the first step of any multi-step filtration system. By removing the largest chunks, it allows the rest of the system to do a better job without clogging right away.

Materials with small pores will trap fine particles, but this also means they will saturate easily and need to be replaced often. We tend to refer to these materials as water polishers, since they help to make the water look much clearer. These are typically used as the last step of any multi-step system.

Chemical filtration
This type of filtration relies the chemical properties of carbon or other materials with high affinity for the types of molecules that we want to remove from the water (ammonia, heavy metals, etc.) As water flows through the substance, those molecules bind to the carbon atoms (or whatever the chemically attractive substance is). Once saturated, the material needs to be replaced or recharged.

Because we often use carbon cartridges to filter our own drinking water, chemical filtration is what most people think about when they think of water filtration. You might be surprised to know that this type of filtration, while useful, is not actually essential in an aquarium. Unless you are trying to remove leftover medication from the water, or you are dealing with a major ammonia crisis, it’s perfectly fine to omit it.

In fact, chemical filtration can sometimes cause more harm than good. Some of the most commonly used substances, such as carbon, begin to leech harmful substances back into the water once it reaches its saturation point. For this reason, it absolutely must be changed once a month. If you’re as lazy as I am when it comes to filter maintenance, you’ll probably want to look into different options. Carbon use has also been linked to hole in the head disease (HITH, or head and lateral line erosion, HLLE) in certain species of fish.

Biological filtration
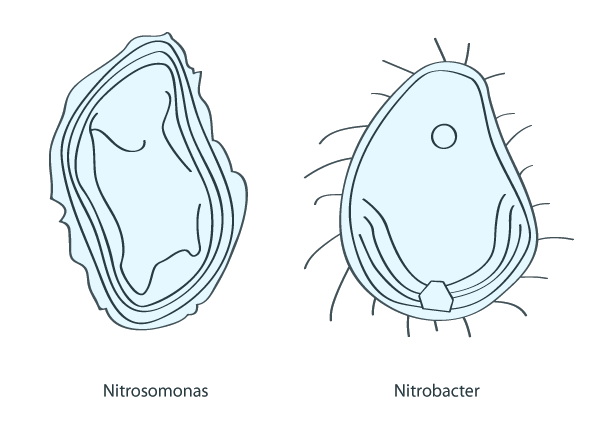
This type of filtration is absolutely essential to the survival of your aquatic pets. A healthy aquarium isn’t just a glass box filled with water — it’s a whole ecosystem, full of living organisms with important roles to play. The term “biological filtration” refers specifically to the most crucial of these organisms: two groups of bacteria that, together, process harmful nitrogenous waste into a much less toxic form. You can read more about this process here: Introduction to the Nitrogen Cycle (or, Why You Killed That Goldfish When You Were Little). For now, let me just say that without these little guys, we wouldn’t be able to keep aquatic pets alive in our homes. Hobbyists call these little magic helpers BBs (short for beneficial bacteria).

To be able to perform their important job, BBs need to make a cozy home for themselves inside your filter. They inhabit porous materials like sponges, bio-balls and ceramic rings. Collectively, we refer to these substances as bio media. The process of helping the BBs colonize their new homes is called cycling, and it is the most important thing you need to do before bringing any new aquatic animal home. You can read about proper cycling methods here: How to Cycle Your Aquarium.

Keep in mind that bio media should never be replaced. If it’s especially dirty, you can rinse it by swishing it around in a bucket filled with aquarium water. Never rinse your bio media under the tap, as BBs are sensitive to chlorine. Don’t squeeze the sponges, either!

If your filter only accepts disposable cartridges, make sure to always leave an old cartridge behind the newer one to give the bacteria a chance to migrate (or better yet, get a better filter!)

Posted on

Introduction to the Nitrogen Cycle (Or, Why You Killed That Goldfish When You Were Little)

Most first-time fish owners kill their pet within a month of bringing it home. This is because most pet stores fail to educate their employees and customers about the nitrogen cycle, a crucial component of the aquatic ecosystem. This beautiful example of commensalism (a symbiotic relationship that benefits all of the organisms involved) is what makes life sustainable for aquatic animals.

The first thing to understand is that an aquarium is not just a box with water in it: it is a miniature replica of the ecosystem that allows life to flourish in our rivers and oceans. The water is full of microorganisms, and some of them have extremely important roles to play.

Meet the nitrifying bacteria:

In the aquarium, just as in nature, animal waste and decaying organic matter constantly release ammonia (NH3) into the water. Ammonia is highly toxic — even a trace can be harmful to most aquatic species. Luckily, bacteria like nitrosomonas are able to use the oxygen present in water to convert ammonia into a less toxic compound: nitrite (NO2).

Note that “less toxic” does not mean “harmless”. Animals tolerate nitrites a bit better than ammonia, but as it builds up in the aquarium (or any other body of water), it can still lead to burns, illness and death. Thankfully, that’s when nitrobacters come in to save the day. Using oxygen, these little guys convert nitrites into nitrates (NO3), which are far less toxic than the other two compounds.

In nature, nitrates don’t really have a chance to build up because plants and algae use them for growth. If you keep plants in your aquarium, they will “eat” some of the nitrates for you. The leftovers will become algae food, which is why you may notice an algae bloom if you haven’t changed the water in a while.

If nitrates keep climbing, the plants and algae may not be able to keep up, and your animals are likely to get sick. This is where you come in! Regardless of the species you are keeping, you should be doing partial water changes at least once a week. It’s a good idea to test for ammonia, nitrites and nitrates once in a while to make sure that your microorganisms are doing their job and keeping your aquarium water safe.

Which brings me to the main point of this post: brand new, clean aquariums are unsafe.

More specifically, the problem lies with the filter. When you first obtain it from the store, the filter is bacteria-free. This means you need to install them yourself and give them time to make themselves at home before you can safely add any animals. We call this process cycling. It takes a while and it’s kind of tricky, so people who don’t understand how important it is tend to skip this step. Then, as ammonia builds up, their animal’s health begins to deteriorate. This is such a common phenomenon that it has been given the name new tank syndrome.

Now that you know why cycling is so important, here’s how to do it properly.

Posted on

Axolotl housing

Proper housing is the key to keeping your axolotl healthy! Please make sure to read all of this before buying an axolotl ᗒ(◍•ᴗ•◍)ᗕ

Aquarium size
The general rule of thumb is to allow a minimum of 10 gallons of water per axolotl. That being said, the important thing is to offer sufficient floor space for your axolotls to be able to move around comfortably. Axolotls typically reach an adult size of 10 to 12 inches, and spend most of their time walking along the bottom of the tank, rather than swimming. Here are my stocking recommendations for some common aquarium models:

  • 10 gal (~20″ x 10″ x 12″): 2 juveniles, or 1 dwarf/mini axolotl
  • 15 gal (~24″ x 12″ x 12″): 1 to 2 adults
  • 20 gal high (~24 x 12 x 16): 1 to 2 adults
  • 20 gal long (~30″ x 12″ x 12″): 2 to 3 adults
  • 30 gal (~36″ x 12″ x 16″): 2 to 3 adults
  • 40 breeder (~36″ x 18″ x 16″): 4 to 5 adults
  • 55 gal (~48″ x 12″ x 21″): 3 to 4 adults
  • 75 gal (~48″ x 18″ x  21″): 5 to 6 adults
  • 120 gal (~48″ x 24″ x 25″): 7 to 8 adults
  • 180 gal (~72″ x 24″ x 25″): 11 to 12 adults

Filtration
Axolotls prefer very slow-moving water and will become stressed to the point of illness if the water flow is too strong. They are very light and easily pushed around by the current. Signs that your axolotl is stressed by the water flow include forward-curled gills, sliding/slipping, and staying in one spot (particularly in a cave or tank corner.)

To avoid this issue, choose a gentle filter such as the ones advertised in my shop section — they are all tried and true axolotl-safe models! Avoid HOB (hang-on-back/power) filters and canisters without adjustable flow, unless you are prepared to turn them into a DIY project!  Already bought them? See my tips & tricks section for ways to turn them into a super efficient, axolotl-safe system. [Coming soon!]

No matter which filter you choose, you will need to provide a source of biological filtration. Just like fish, axolotls are prone to new tank syndrome, which means proper cycling is absolutely essential. If you’re not sure what any of  this means, please read this: Introduction to the Nitrogen Cycle (Or, Why You Killed That Goldfish When You Were Little).

Substrate (or not?)
Contrary to popular belief, axolotls do just fine in a bare-bottom tank, as long as the water flow is sufficiently gentle. I personally prefer to keep my tanks bare, as I find it easier to clean. If you prefer to use a substrate for esthetic reasons, keep in mind that both sand and gravel are now known to pose an impaction risk [article coming soon!]. If you choose to use sand, make sure the grain is small and smooth, and that the material is non-clumping. Types of sand successfully employed by aquarists include:

  • Caribsea Super Naturals Moonlight Sand (stir weekly or use a thin layer)
  • Caribsea Sunset Gold (stir weekly or use a thin layer)
  • Seachem Meridian (not as smooth, but very small and carbonate-based — recommended as buffer if your water is on the soft/acidic side — stir weekly or use a thin layer)
  • Play sand (available at hardware stores — larger grain, requires heavy rinsing — use with fully grown adults only)
  • Pool filter sand (available at pool supply stores — larger grain, requires heavy rinsing — use with fully grown adults only)

Gravel is unsafe at nearly every stage of the axolotl’s life. Remember, axolotls are like babies: if it fits in their mouths, it will end up in their mouths! If you really want to use rocks, use large, smooth pebbles or river rocks that are significantly larger than your axolotl’s head, to make sure they won’t be ending up as a snack.

Decor
Axolotls like to explore their environment, so it’s a good idea to switch up their decor once in a while to keep them entertained. They like to have objects to climb, floating items to cling to, and places to hide. Pvc pipes, clay pots, caves and driftwood are all appreciated. Make sure all of the decor pieces are smooth, and too large to get accidentally swallowed. Plants are fine (plastic or live). Axolotls are carnivorous, so they have no interest in eating live plants — they just enjoy hiding in them or clinging to them for support. I recommend getting the floating kind, as they also provide shade, and will stay out of your way during water changes.

Lighting (or not?)
Axolotls don’t particularly need lighting, and will shy away from bright lights. They don’t have eyelids, which makes them easily blinded by sudden light changes. Their vision in general is poor, and they hunt largely by following smells and reacting to movements in the water. If you need to use lighting for plant growth or picture-taking, just make sure you provide your axolotl with some shaded spots to hide in.

Temperature
Axolotls are subtropical animals, which means they should never be kept in a heated aquarium. They can handle temperatures between 4 and 22°C, with 15 to 18°C being their preferred range. At 23°C, they start to get uncomfortable and often refuse to eat. At 24°C and above, the stress can cause them to get physically ill, and eventually cause death. If possible, try to keep your aquarium in a cool part of the house. During summer, you may need to cool the room down with air conditioning. A regular desk fan or a small clip-on fan may help lower the aquarium’s temperature by a few degrees. If this isn’t sufficient, you may need to purchase an aquarium fan or chiller.

Cover (or not?)
Axolotls rarely jump out of their aquariums, but it can happen. If you choose not to use a cover, make sure the water level is low enough to discourage jumping.