Posted on

Why is my axolotl not eating?

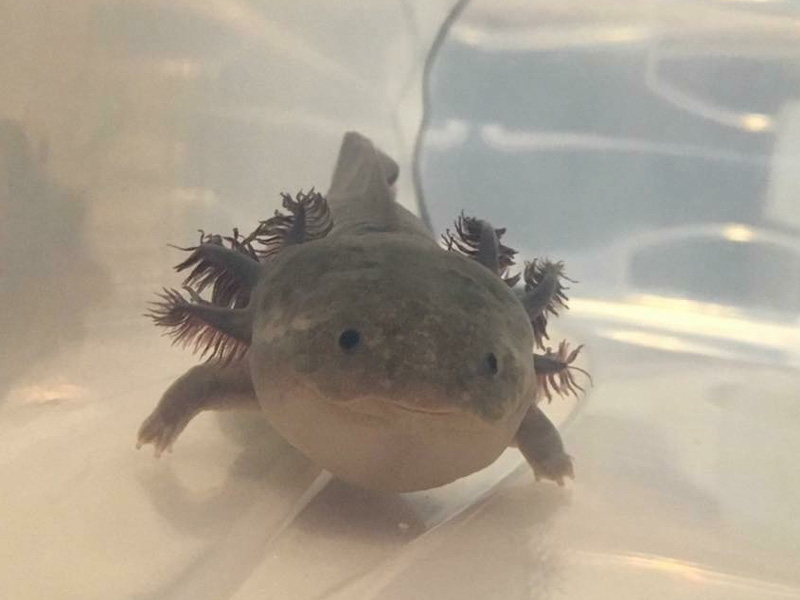
Axolotls may refuse food for many different reasons. Here is a list of 10 possible causes, ranked from most common to least common. Try working your way down the list, ruling out the more common issues until you can identify the problem you’re dealing with.

1. Moving stress

It’s not uncommon for axolotls to refuse food for a day or two when they first arrive in a new home. Keep in mind, s/he is trying to adjust to a whole new environment, including a new owner, and possibly different foods and feeding methods. Be patient! Your new pet will warm up to you once s/he realizes that there is nothing to be afraid of.

2. Warm water

Axolotls are subtropical, and do not handle summer temperatures well. Most axolotls suffer from heat stress and will refuse food as their water reaches 23°C or higher. Heat stress in axolotls can be deadly, particularly at 24°C or above. In an emergency, fans or frozen water bottles can help shave off a few degrees. I will post a more in-depth article on this topic as soon as I am able. Thank you for your patience.

3. Ammonia issues

Ammonia makes axolotls queasy, so they may refuse food or even throw up. If you’re keeping your axolotl in a tank, make sure your filter is properly cycled. In a tub, remember to do a full water change every day!

4. Problems with the food

Axolotls may ignore or spit food out when it’s too big, too hard, or it just has a nasty taste. Try cutting overlarge food in half. You can use scissors to cut up large earthworms, or a pill cutter to cut overlage pellets. Choose a pellet that softens rapidly in water. Avoid worms that taste bitter, such as red wigglers (Eisenia fetida). To avoid spoilage, don’t buy larger quantities of dry food than your axolotl can consume in approximately one month, and try to reseal the package properly after use. Don’t allow frozen food to thaw and then re-freeze.

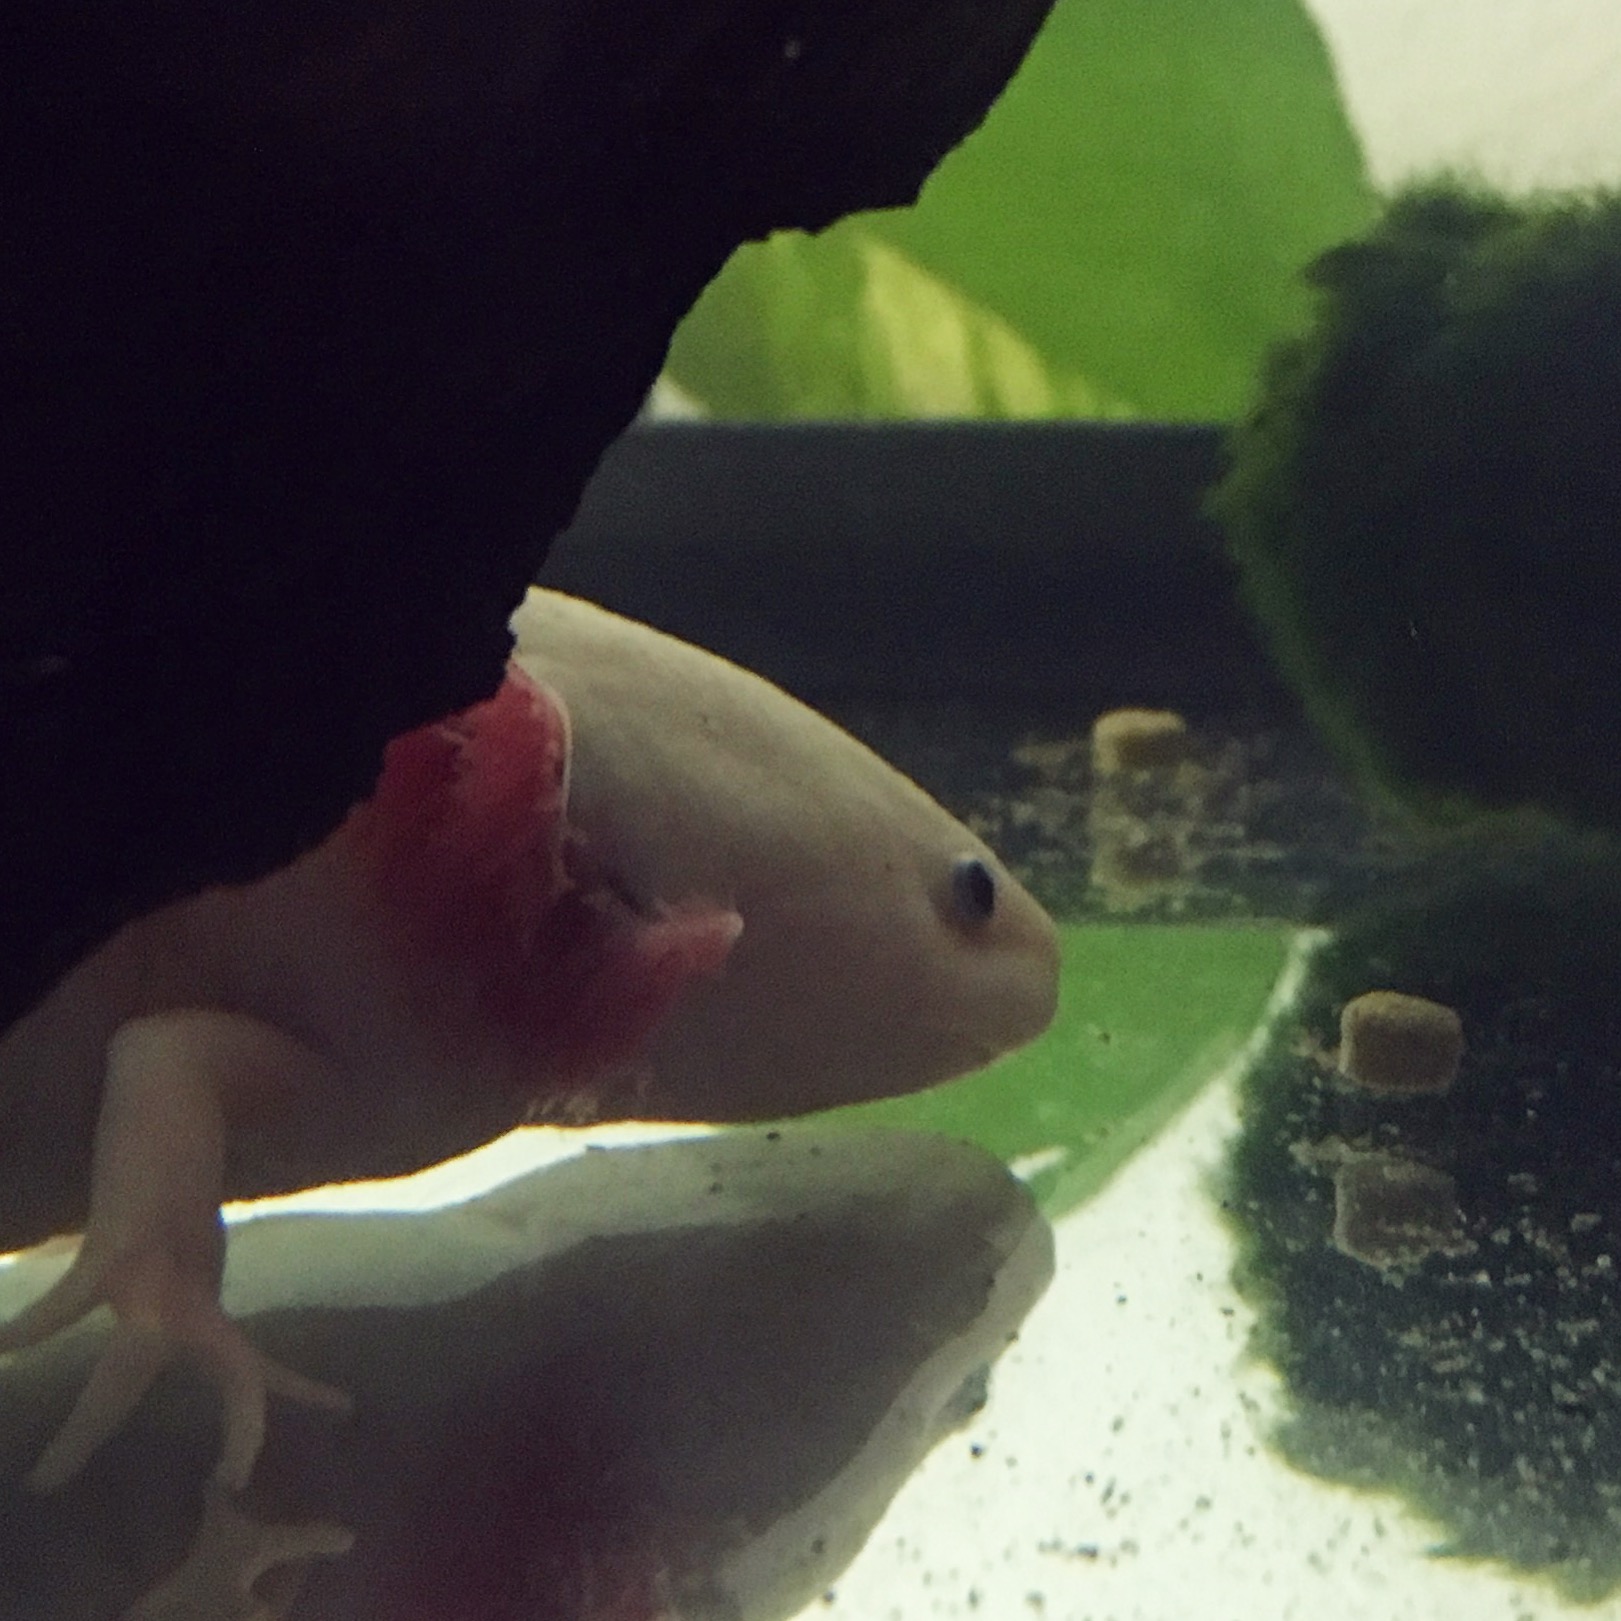
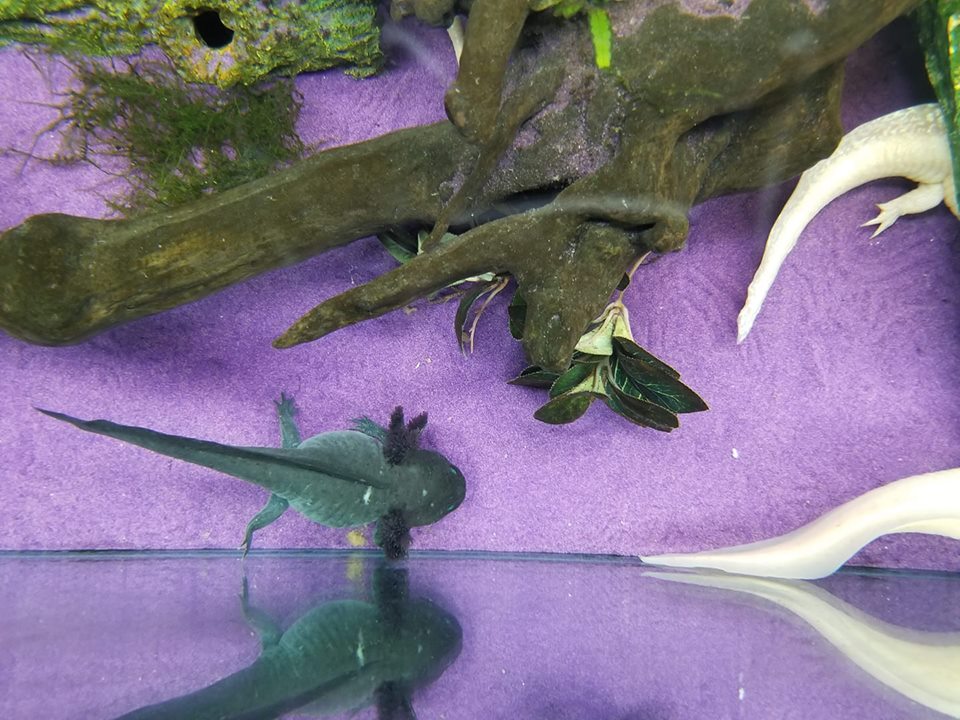
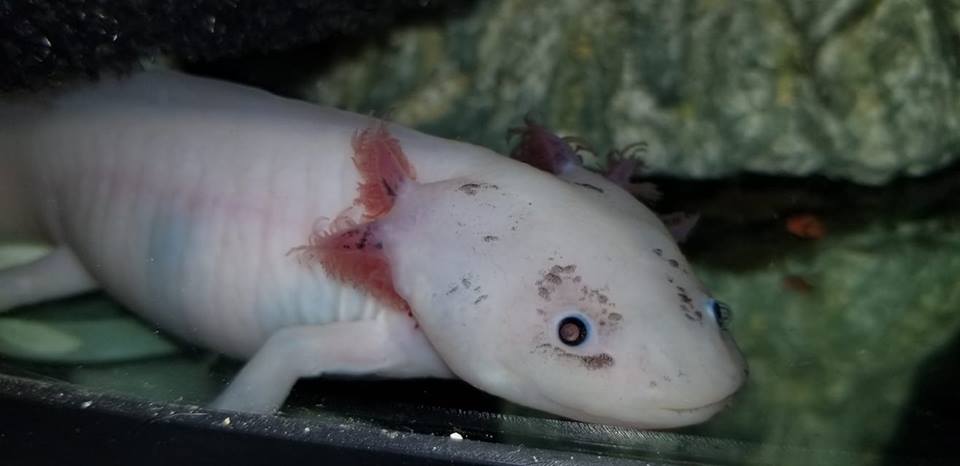
5. Aggressive tankmates

If your axolotl is moving away from food or staying hidden at feeding times, they may be afraid that moving towards the food will draw in their neighbor’s wrath — especially if they’ve gotten nipped by them before. The solution is to feed the more aggressive axolotl in a separate container. If you’re worried about nipping at other times, it’s best to rehome the aggressive axolotl to another tank entirely. Note that biting of same-sized tankmates is not a normal adult behavior and often indicates a severe nutritional deficiency.

6. Pre-hibernation

In very cold water (<15°C), axolotls may act sluggish and show a lack of interest in food. They may also poop more than usual, and/or vomit, especially at the lowest end of their tolerated temperature range (4-8°C) or after a rapid decrease in temperatures (e.g when fridging). This is a normal physical adaptation to the low temperatures, and not a sign that your axolotl is sick. Gradually increase temperatures to a more comfortable range (15°C-18°C) and your axolotl should resume their normal behaviour.

7. Impaction

If your axolotl refuses to eat for several days in a row, they could have swallowed something that caused a blockage. This is unfortunately a relatively common issue in axolotls, as they have a tendency to eat aquarium gravel, small rocks and anything else they can fit in their mouths. I will be writing a separate article on how to treat and diagnose impaction, but in the meantime, please consult a veterinarian if you suspect that your axolotl is impacted. If your axolotl swallowed a piece of Indian almond leaf, please inform a vet immediately, as this also poses a risk of tannin overdose. 

8. Intestinal parasites

If your axolotl has been refusing food and/or throwing up for a week or longer, and all of the above causes have been ruled out, intestinal parasites are the most likely culprit. You should contact a veterinarian in your area to discuss possible treatments. If you’re able to collect a stool sample, that will make parasite identification a lot easier. Your vet may also ask for a water sample.

9. Egg or water retention

Egg and/or water retention rarely happens, but it does happen! In addition to causing discomfort, severe bloating compresses the animal’s digestive tract, making eating difficult. If your axolotl looks bloated and the above causes have been ruled out, try housing them in a 40% concentration of Holtfreter’s or John’s solution [more info on this soon]. If your axolotl is female, try pairing her with a male to trigger egg-laying, and add some plants or decor for the eggs to be deposited onto.  Contact a veterinarian asap if:

  • you see no improvement after 48 hours
  • other symptoms are present
  • your female seems to be having difficulty laying eggs, or the eggs are looking non-viable

10. Other severe illness

If all the other causes have been ruled out, you should assume that your axolotl is battling a severe illness and requires urgent veterinary care. 

Posted on

How do I train my axolotl to eat pellets?

1. Make sure the pellet is small enough for your axolotl’s mouth.

2. Wait until they are hungry!

3. If they are used to feeding from tongs or fingers, try this method first.

4. Try dropping the pellets one by one just above their nose, so that they are tempted to snap.

5. It’s normal for your axolotl to hesitate at first, and maybe even spit the pellet out. Even if they don’t go for it right away, leave one or two pellets in the water overnight. A good quality pellet will entice them by smell, and will usually be gone by morning.

6. If your axolotl still won’t try the pellets, don’t feed them their usual food until the next day — you don’t want to create a “if I ignore the pellet I will get my favorite treat” association!

7. Don’t try introducing pellets several days in a row. You should alternate with normal feedings, to make sure that your axolotl stays healthy and that their refusal to eat is not due to a different stressor, such as water quality issues.

8. If your axolotl still won’t touch the pellets on your third try, and they have no trouble eating other foods… Use a better pellet!

Posted on

Axolotl sizes: what is the difference between a mini, dwarf and short toes axolotl?

Dwarfism

MissPiggy, a four-month-old dwarf axolotl. Photo: Briitney Alyssah Darlene Long

This picture of Tadpole, a dwarf axolotl, shows the added strain that the condition puts on female axolotls’ bodies when gravid. Photo: Patricia’s Gill Babies

Dwarfism is a genetic condition which causes a foreshortening of the chest area and a smaller than usual adult size. Limbs may also appear shorter than usual, although the axolotl’s fingers and toes keep a normal appearance. Dwarfism can lead to health issues and shortened lifespans, particularly in females, due to the large number of eggs they carry. Dwarf axolotls should never be allowed to breed, and may need to be housed separately to avoid getting picked on by larger adults.

‘Mini’ features

Ravyn the mini axolotl only reached an adult size of six inches. Photo: Patricia’s Gill Babies

A mini axolotl is one whose growth stops before reaching adult size, which can be the result of genetic issues (often due to inbreeding) or stunting due to poor husbandry. Minis may be normally proportioned, or have a somewhat smaller than average tail, with normal chest and limbs. Just like dwarves, minis may require separate housing, and it is preferable not to breed them.

Short toes syndrome

Axolotl suffering from short toes syndrome. Unfortunately, some unscrupulous breeders take advantage of this painful and deadly condition by marketing the afflicted animals as “dwarf axolotls”. Buyers beware! Photo: Amanda Gomes

Axolotls with short toes syndrome look similar to dwarves, but they have short fingers and toes that give their hands and feet a padded appearance. Over time, they develop a pudgy appearance due to oedema, an accumulation of interstitial fluid within the body tissues, which causes bloating of the entire body (pictured above). Short toes syndrome is a very serious and irreversible condition which invariably leads to painful oedema, hemorrhages and organ failure. To prevent unnecessary suffering, axolotls affected by this condition should be euthanized as soon as the condition is detected.

Posted on

Bigger is better! (Why you should get the largest tank possible)

Whether you’re a beginner or an experienced aquarist, here’s why you should buy the BIGGEST tank you can afford.

1. It’s less work!

Larger tanks require fewer water changes. Having a larger tank allows you to use more filtration, which keeps your water cleaner longer.

2. It’s more forgiving of your mistakes

Everything is more stable when you’re dealing with a larger body of water: the temperature doesn’t fluctuate as much, pH is more likely to stay constant, and nitrogenous waste has less of an impact when there’s a lot of water to begin with. These three factors (temperature, pH and nitrogenous waste concentration) also affect the overall toxicity of ammonia (article coming soon!). This means that smaller setups are more likely to swing rapidly between non-toxic and toxic conditions. Some species such as freshwater shrimp are especially sensitive to sudden environmental changes, which makes them challenging to keep in a small environment.

3. Your animals will appreciate it.

A larger enclosure gives you the opportunity to provide a more natural environment for your animal. They will certainly appreciate the freedom of movement and the mental stimulation that a more complex environment can afford. An animal who is comfortable in their enclosure will reward you by displaying more natural behavior.

4. It helps them fight off viruses!

Larger tanks provide a temperature gradient — the surface is warmer than the bottom of the tank. One side may also be warmer than the other, depending on light positioning (and heater positioning, if you’re keeping tropical species). Having a temperature gradient in your tank allows your animals to adjust their body temperature, and even to self-medicate! Fish and amphibians are poikilotherms, which means their body temperature is meant to vary along with their environment. It also means that their bodies are not able to trigger a fever when they are sick. Instead, they rely on what we call behavioral fever: a sick animal will gravitate to the hottest area of the tank, act sluggish for a while, and wait for the virus or bacterial infection to pass. Amphibians are also particular in the way that they gravitate to colder temperatures when recovering from illnesses and injuries. Some scientific studies suggest that axolotls’ impressive recovery abilities function best at near-hibernation temperatures.

Posted on

Axolotl tankmates: fish edition

Can you keep axolotls with fish? The answer, surprisingly, is yes — you just need to choose your fish carefully.

One thing to keep in mind when keeping fish with axolotls is that those long flowy gills can start to look like food to just about any fish who’s hungry enough. Make sure to keep your fish well-fed, and be ready to move them out at the first sign of gill damage.

Ideal tankmates
My personal success stories! These peaceful fish enjoy cold, hard, neutral pH water. In addition, they are either too fast for axolotls to catch, too big to make an attractive meal, or they reproduce fast enough that the population should be able to maintain itself.

  • Golden skiffia
  • Orange-finned danio (extra aeration & aquarium cover required)
  • White cloud mountain minnow
  • Zebra danio

Potentially good tankmates
These fish sound like they could be good axolotl tankmates in theory, but I have not tried them personally, or they did not work for me, for various reasons.

  • Bengal danio (extra aeration & aquarium cover required)
  • Checkered barb
  • Dusky millions fish
  • Frail gourami
  • Giant chinese bitterling (non-breeding, large aquarium required)
  • Golden barb
  • Green swordtail
  • Indian glass barb
  • Inle loach
  • Maharaja barb
  • Moustached danio
  • Pearl danio
  • Peninsular danio (extra aeration required)
  • Playfair’s panchax
  • Rainbow characodon
  • Red-line torpedo barb
  • Red-spotted panchax
  • Rosy barb
  • Rosy danio (extra aeration & aquarium cover required)

Swimming buffet
These are fish who enjoy the same water parameters as your axolotls, but are likely to become dinner very fast. If you breed them in a separate tank, they could be an attractive option as a source of cheap live food.

  • Golden dwarf barb
  • Medaka (japanese ricefish)
  • Northern glowlight danio
  • Odessa barb
  • Shalyni barb
  • Two-spotted barb

Experienced fishkeepers only!
These species could potentially be a good match, provided that you are able to maintain your water temperatures at a steady 20°C ±1°C. Do read the fish’s care requirements carefully before you make the plunge, as you may need to modify your tank setup or maintenance routine. Do keep an eye out for signs of stress in both species, and be ready to separate or adjust your setup as needed.

  • Black-barred danio
  • Blue danio
  • Blue moon danio
  • Clown barb
  • Dwarf spotted danio
  • Glass barb
  • Gold ring danio
  • Greenstripe barb
  • Guppy (here’s why)
  • Hikari danio
  • Onespot barb
  • Scarlet badis
  • Spotted barb
  • Swamp barb

Not recommended
While these fish can be kept at room temperature, they should not be kept at temperatures below 21°C for extended periods of time.

  • Banded epiplatys
  • Banded leporinus
  • Beardless barb
  • Black neon tetra
  • Black paradise fish
  • Black phantom tetra
  • Black ruby barb
  • Blackwing hatchetfish
  • Bleeding heart tetra
  • Bluefin nothobranch
  • Brown spike-tailed paradise fish
  • Celestial pearl danio
  • Cherry barb
  • Chocolate gourami
  • Columbian tetra
  • Common hatchetfish (silver hatchetfish)
  • Crossband chocolate gourami
  • Crystal red tetra
  • Cuming’s barb
  • Dadio
  • Discus tetra
  • Dwarf barb
  • Dwarf panchax
  • Dwarf rasbora
  • Ember tetra
  • Emerald dwarf rasbora
  • Empire gudgeon
  • Eyespot rasbora
  • False spanner barb
  • False x-ray tetra
  • Filament barb
  • Fire bar danio
  • Fireline devario
  • Five-banded barb
  • Flag tetra
  • Flame red rasbora
  • Flame tetra
  • Flying barb
  • Flying minnow
  • Glowlight rasbora
  • Golden pencilfish
  • Green line lizard tetra
  • Green neon tetra
  • Green panchax
  • Harlequin
  • Honey gourami
  • Indian glass fish
  • Jelly bean tetra
  • Least killifish
  • Lemon tetra
  • Lined barb
  • Lipstick leporinus
  • Lyretail killi
  • Mad barb
  • Madagascar panchax
  • Marbled hatchetfish
  • Mayan tetra
  • Mosquito rasbora
  • Narayan barb
  • Neon tetra
  • Ornate tetra
  • Pookode lake barb
  • Powder-blue panchax
  • Queen danio
  • Rainbow tetra
  • Red dwarf rasbora
  • Red phantom tetra
  • Red-chinned panchax
  • Red-striped killifish
  • Red-tailed tinfoil barb
  • Rosy loach
  • Savanna tetra
  • Siamese algae eater
  • Silver hatchetfish
  • Six-barred panchax
  • Snakeskin barb
  • Spanner barb
  • Spiketail paradisefish
  • Spotfin hatchetfish
  • Spotted headstander
  • Steel-blue killifish
  • Steindacher’s apisto (A138)
  • Striped flying barb
  • Striped headstander
  • Tasseled-mouth loach
  • Three-striped apisto (A204)
  • Threespot leporinus
  • Variable platy
  • Whitespot eartheater
  • Yellow phantom tetra
  • Yellow tetra

Direct competitors
These bottom-dwelling fish would infringe on your axolotl’s turf, which could lead to stress and aggressive behaviors. This includes most loaches and catfish.

  • Badis
  • Black-lined loach
  • Chinese false gudgeon
  • Horse face loach
  • Kansu loach
  • Mini dragon loach
  • Moose-faced loach
  • Panda loach
  • Peacock loach
  • Ring loach
  • Yo-yo loach
  • Zebra loach

Probably too aggressive
While these guys enjoy cold hard water, I’m not sure about their temperaments. Based on what I know of their close relatives, I would expect them to be too aggressive to be kept with axolotls.

  • Florida flagfish
  • Mekong tiger perch
  • New guinea tiger perch
  • Roundtail paradise fish
  • Sharphead eartheater

Too endangered
Given their precarious conservation status, it wouldn’t make sense to keep these fish in the same tank as a potential predator.

  • Eyespot gourami
  • Siamese tiger perch
  • Spanish toothcarp

Don’t even think about it!
These fish have a tendency to nip at flowy fins and gills, or have environmental needs that differ greatly from those of axolotls. This includes most bettas, cichlids, piranhas, pacus and sharks. I’m not including obligate brackish or saltwater fish, but it goes without saying that those would not be a good match either!

    • African blackfin barb
    • African butterfly barb
    • African red-eyed tetra
    • Ajime loach
    • Amapa tetra
    • Apistogramma spp. (A52, A164, A165, A167, A174, A188, A208, A218, A220, A221, A222)
    • Arrow loach
    • Arulius barb
    • Banded tiger loach
    • Barred danio
    • Barred pencilfish
    • Bengal loach
    • Betta (siamese fighting fish)
    • Biara
    • Black darter tetra
    • Black kuhli loach
    • Black shark
    • Black spot pirhana
    • Black tiger dario
    • Blackstripe pencilfish
    • Blind cave tetra
    • Bloodfin tetra
    • Blue-faced peacock
    • Brichardi
    • Broken-line killifish
    • Brunei beauty
    • Buenos aires tetra
    • Burmese badis
    • Burmese red-tailed garra
    • Butterfly goodeid
    • Butterfly loach
    • Canara pearlspot cichlid
    • Cardinal tetra
    • Chameleon loach
    • Cherry-fin loach
    • Ceylonese combtail
    • Climbing perch
    • Clown loach
    • Congo barb
    • Crescent betta
    • Croaking gourami
    • Cupid cichlid
    • Dawn tetra
    • Deissner’s liquorice gourami
    • Doctor fish
    • Drape fin barb
    • Dwarf chain loach
    • Dwarf pencilfish
    • Emerald betta
    • Emperor botia
    • Emperor cichlid
    • Emperor tetra
    • Fire rasbora
    • Flame-back bleeding heart tetra
    • Flying fox
    • Forktailed loach
    • Gabon killifish
    • Gar characin
    • Giant chocolate gourami
    • Giant danio
    • Giant kuhli loach
    • Glowlight danio
    • Golden zebra loach
    • Goldfish (!!!)
    • Goulding’s piranha
    • Grant’s peacock
    • Green throat mouthbrooder
    • Green tiger loach
    • Greenstripe pencilfish
    • Grizzled loach
    • Half-banded loach
    • Hampala barb
    • Hockeystick pencilfish
    • Hummingbird tetra
    • Imperial flower loach
    • Indonesian tiger perch
    • Java combtail
    • Kennedy’s tetra
    • Kissing gourami
    • Knife livebearer
    • Kuhli loach
    • Lambchop rasbora
    • Laos blackline torpedo loach
    • Laos redtail loach
    • Least pencilfish
    • Leopard bushfish
    • Leopold’s tetra
    • Lesser bleeding heart tetra
    • Lipstick barb
    • Long-finned tetra
    • Loreto tetra
    • Malawi butterfly
    • Manipur baril
    • Marbled headstander
    • Melon barb
    • New yellow regal peacock
    • Northern aulonocara
    • Oiapoque eartheater
    • One-lined pencilfish
    • Orinoco eartheater
    • Ornate paradisefish
    • Ornate tiger sand loach
    • Oscar
    • Panamanian eartheater
    • Panda garra
    • Panda loach
    • Panther danio
    • Paradise fish
    • Payara
    • Pearl cichlid
    • Peruvian tetra
    • Piraya
    • Polka-dot loach
    • Purple pencilfish
    • Purple tetra
    • Pygmy hatchetfish
    • Rainbow shark
    • Red bellied piranha
    • Red-shouldered peacock
    • Red-spotted tetra
    • Red-spotted splashing tetra
    • Red-tailed black shark
    • Red-tailed freshwater barracuda
    • Redfin tiger loach
    • Redflanked bloodfin
    • Redspot cichlid
    • Retail loach
    • Rhino garra
    • Rosy tetra
    • Ruby tetra
    • Saddle cichlid
    • Saddle-back loach
    • Sailfin characin
    • Serpae tetra
    • Sheep pacu
    • Shining pencilfish
    • Silver loach
    • Silver shark
    • Silver tiger perch
    • Skunk loach
    • Slender betta
    • Smudge spot cory
    • Snakehead betta
    • Soda cichlid
    • Sparkling gourami
    • Speckle-tailed loach
    • Splash tetra
    • Splendid killifish
    • Spotscale barb
    • Spotted betta
    • Spotted butterfly loach
    • Spotted hampala barb
    • Spotted metynnis
    • Striped anostomus
    • Striped flying barb
    • Striped pike characin
    • Sucking loach
    • Sulphurhead peacock
    • Sumo loach II
    • Sun loach
    • Sunshine peacock
    • Super convict loach
    • Ternetz’s anostomus
    • Tiger barb
    • Tiger hillstream loach
    • Tinfoil barb
    • Two spot astyanax
    • Three-lined pencilfish
    • Two-stripe pencilfish
    • Two-striped apisto
    • Vaillant’s chocolate gourami
    • Vampire tetra
    • Vietnamese marbled hog-faced loach
    • Violet shark
    • White piranha
    • Yellow-tailed congo tetra
    • Yellowhump eartheater
    • Yoma danio
    • Western mosquitofish
    • X-ray tetra
    • Zipper loach
    • Zodiac loach
Posted on

Axolotl breeding, part 1: genetic and health considerations

Selecting a female

Female axolotls can lay up to 1000 eggs at once, which is exhausting for the female. She does not get a break to recover afterwards — her body immediately resumes gamete production, which comes with a high energy cost. For this reason, repeatedly beeding a female can be detrimental to her health. Breeding her too early can also interfere with her growth. Please be mindful of these considerations when choosing a female to breed — choose a female who’s fully grown (at least a year old) and has a healthy appetite and appearance, with a big round belly. Keep in mind that the same female should only be bred a maximum of three times in her lifetime, with a long break in between breedings. Personally, I try to breed females only once, unless they have exceptional characteristics. I also never breed females more than once a year.

Selecting a male

When it comes to choosing a male, the most important thing to consider is genetics. You’ll want to make absolutely sure that your male has no family relation with your female — this would lead to genetic defects in the offspring that can be quite dramatic. Beyond that, it helps to be familiar with how genes combine to create different morphs (phenotypes). Personally, I like to select males with traits that match the female’s best characteristic: for example, my “K” line is all about cute round faces, whereas my “B” line is all about blue gills.

Traits to avoid

You should never, ever breed axolotls with obvious genetic defects, such as:

  • dwarfism [article coming soon!]
  • short toes syndrome
  • “mini” features
  • any physical deformation that isn’t due to regrowth after nipping
  • a tendency to float frequently (especially upside down)
  • other recurrent health issues (e.g. very prone to fungus)

In case of accidental breeding

If you’ve accidentally kept a male and a female together and ended up with eggs, it may seem like the kind choice to keep them and raise them… But in reality, it’s the self-indulgent route that should be avoided in most cases. If the two parents are genetically related (e.g. brother and sister), or if one or both parents have genetic defects, you really wouldn’t be doing the larvae a favor by attempting to raise them. Not only would it compromise their quality of life, but it also poses a risk that the genetic issue will be passed on to future generations if those axolotls also end up getting bred (accidentally or otherwise).

Avoid this rookie mistake!

Another important point to consider is: how many of the eggs can you afford to keep? Raising larvae requires time, effort and space. They are also complicated and expensive to feed, compared to adults. If you are breeding axolotls for the first time, I wouldn’t recommend keeping more than 10. If you keep more than you are able to care for, you will be stretching your resources thin, and the quality of your care will suffer. Trust me — don’t try raising hundreds of axolotls on your first try. You have plenty of time to try your hand at raising more after you’ve brought these first 10 to maturity. You’ll be better prepared to tackle higher numbers once you have a clear idea of the challenges involved.

How to get rid of unwanted axolotl eggs

Freeze them. This will cause the larvae to go into hibernation mode, dulling their sense of pain before vital functions shut down. They will be unconscious before ice crystals begin to form. Once they are frozen solid, you can dispose of the eggs in the compost or trash.

Happy responsible breeding! : )

Posted on

Shipping, DOA and refund policies

Live animal shipping

I ship live animals to all Canadian provinces where Canada Post’s Xpresspost and/or Priority services are available. Note that, as per Canada Post’s regulations, live animals can only be shipped from April 1st to October 31st. Additionally, I cannot ship axolotls to provinces where axolotls are illegal to own (i.e. BC and PEI).

DOA policy

In case of death on arrival, please send pictures within two hours of delivery and I will send a replacement at no charge. In case of live eggs shipping, hatch rate is not guaranteed.

Returns

Unopened dry food items may be returned for refund within 30 days of delivery. Please include your invoice number. Live and frozen food sales are final.

Other items may be returned for refund within 30 days of delivery as long as they are still in their original condition. Please include your invoice number.

Posted on

Privacy policy

It bothers me that so few companies take the necessary steps to protect your personal information online. I strive to be better. Here’s how:

I don’t track you

I don’t use Google Analytics or any other metadata collection tool or tracker. Those things are useful, but creepy. I can manage without them.

I collect as little data as possible

I only collect the information I need to invoice, ship and refund orders as necessary. You don’t even need to create an account in order to buy from me. Incomplete transactions and inactive accounts are purged regularly, and if you delete your account, it will be deleted for real. That’s actually a rare thing, believe it or not!

I’m picky with third-parties

I’m using WordPress to power this website, but I keep it on a tight leash. I use the minimum amount of plugins necessary to keep this website functional. This includes the components needed to keep this shopping cart working, a cache plugin to prevent my server from getting overwhelmed, and font and language support. I use the strictest possible settings to limit these plugins’ abilities to access and retain your information. I also do my best to keep them up-to-date to prevent security exploits, and take steps to keep my WordPress tough to hack. It pays to date a systems administrator! 😉

I encrypt everything

Even if my website ever got hacked, everything on it is encrypted from start to finish. You will never be asked to login in order to activate encryption, or be made to bounce between encrypted and non-encrypted sections. The services I use to process your transactions, which are WooCommerce and Paypal, also encrypt everything on their end. Any local backups I keep are encrypted as well.

I don’t force you to go through social media

I hate when sites do that! I do have a Facebook page and an Instagram account, because a lot of people prefer to contact me through there, and they allow me to share pictures easily and keep in touch with other breeders across the country. That being said, you absolutely do not need to use these services in order to contact me or buy from me.

If you do choose to use Facebook or Instagram, know that any information that transits through their services is subject to their ever-changing, morally dubious privacy policy. I go over the privacy settings often and select the most restrictive permissions possible, but using your personal information for profit is Facebook’s entire business model. If you have a problem with that, I do too. That’s why I made this website!

I don’t target you for advertising purposes

I’ve worked in advertising, so I’m acutely aware of how annoying, pervasive and potentially damaging it is. Beyond updating my Facebook and Instagram pages once in a while, I don’t really advertise at all. I trust that my reputation will be enough to do the job. If you need me, you’ll find me. It may seem like a weird business model in this day and age, but it works for me so far.

I will never spam you

Ever! I don’t even have a newsletter. Your inbox is safe with me : )

Any questions?

I aim for transparency. If there’s anything you’d like to know that isn’t covered here, feel free to drop me a line.

Posted on

Common axolotl myths

Myth #1: Bare bottom tanks cause axolotls to slip and become stressed

If your axolotl is slipping on the glass, your water flow is too strong. Your axolotl should be able to walk along the bottom of the tank without sliding or slipping.

Myth #2: Sand causes impaction in adult axolotls

The use of sand may be risky for axolotl larvae, but there are no documented cases of impaction caused by sand in adult axolotls. However, impaction cases caused by gravel ingestion in adult axolotls are frequent. Which brings us to…

Myth #3: Gravel is a safe substrate for axolotls

Absolutely not! Remember: if it’s smaller than their head, they will ingest it; if it’s larger than their poop, they won’t be able to pass it!

Myth #4: Goldfish are acceptable tankmates for axolotls

Although they both enjoy similar water conditions, these two species are not a good match. Axolotls are not very good at catching fish, but given the chance, they will eat any fish that fits in their mouth. Goldfish aren’t safe for axolotls either, as they tend to nip at their gills. Their bones can also cause impaction due to their size.

Myth #5: You don’t need to feed your axolotl as long as you keep fish in the tank

Again, axolotls are not good hunters. If live fish are the only option on the menu, they will most likely starve.

Myth #6: Frozen bloodworms are an acceptable staple food for axolotls

Bloodworms are a fatty, low-protein snack. Think of them as the french fries of the aquatic world. Axolotls who are fed nothing but bloodworms for an extended period of time become emaciated and tend to bite off their tankmates’ limbs.

Myth #7: Indian almond leaves and black tea work as painkillers for axolotls

Unfortunately, indian almond leaves and black tea have no effect on pain. The tannins they release do have mild antibacterial and antifungal properties, however.

Myth #8: If you see fungus on your axolotl’s gills, you should pull it off or remove it by rubbing it with a Q-tip.

Please don’t do this! By pulling out the fungus, you are literally ripping out living flesh, which is extremely painful. Just allow the fungus-infected gill tissue to necrotize and fall off on its own.

Myth #9: It’s okay to use fish antibiotics on axolotls as long as you use half-doses

First of all, you shouldn’t use antibiotics on an axolotl unless you know which bacteria you are fighting against. If you suspect that your axolotl has a bacterial infection, please ask a veterinarian how you can send in a sample for identification.

Secondly, there is no guarantee that a fish-safe medication will be safe for axolotls. Unless a scientific article or veterinary account confirms that a medication is safe to use on amphibians, please assume that it isn’t!

Finally, by reducing the dose of the antibiotic, you run the risk of creating new strains of antibiotic-resistant bacteria. When treating with antibiotics, always follow dosing instructions and administer the treatment for its entire duration, even if the symptoms are gone.

Posted on

How to Cycle Your Aquarium

This article details the safest and most efficient aquarium cycling methods, and highlights some common cycling issues. If you’re not sure what cycling means, please read this article first: Introduction to the Nitrogen Cycle (Or, Why You Killed That Goldfish When You Were Little).

Seeded media method

This is the easiest, fastest and safest cycling method. “Seeded” filter media is any porous material that has been previously used in someone’s filter and still contains active nitrifying bacteria.

Step 1: Obtain the bacteria

If you have an established aquarium and are trying to set up a new one, simply transfer some of the biological media from that filter to your new one. Otherwise, you can ask a friend or your local fish store to give you some of their used filter media. (If you’re in the area, come see me and I will give you some of mine!) Once the media is in place, simply start your filter and let the bacteria do their work.

Step 2: Feed the bacteria

To keep the bacteria alive in your filter, you will need to provide them with a source of ammonia. Follow the ammonia or live-in methods from this point on. Note that the live-in method will be stressful for your animals. Using seeded media shortens the cycling process, but it could still take anywhere from a few days to a few weeks.

Ammonia method

This is the method I recommend if you have a brand new aquarium with no living animals in it. You can buy small amounts of pure ammonia from my shop, or find some in the cleaning section of most hardware stores. Some people prefer to let fish flakes or a raw shrimp decompose in their aquarium to create a source of ammonia, but this makes the process a lot slower and can introduce harmful pathogens to your tank. It’s also unreliable, as the amount of ammonia produced this way is extremely variable. Using pure ammonia allows you to control the exact concentration of ammonia that ends up in your tank.

Step 1: Obtain the bacteria

Aside from ammonia, you will need a source of bacteria. You could take your chances and wait for them to occur naturally in the water, but using bottled bacteria will speed things up considerably. You can obtain some from my shop or any pet store that sells fish. Any brand of bottled nitrifying bacteria will work. Pour them into the water and they will cling to whatever surface they find. The more porous surface they have to inhabit, the better. The vast majority will end up inside your filter, as they require a lot of oxygen to thrive. So make sure you have porous material in there, and always keep the filter running!

Step 2: Feed the bacteria

You’ll want to start with an ammonia concentration of 2 to 4 ppm. To get to this concentration, add 2 to 4 mL of pure ammonia per L of aquarium water (~1/2 Tbsp to 1Tbsp per gallon). This single dose should be enough to keep your bacteria fed for the entire duration of the cycling process.

Step 3: Monitor the parameters

Follow the instructions in the monitoring section, starting from step 2.

Emergency live-in cycling

If you already have animals in your aquarium and you’re unable to relocate them to a different, well-established tank while their current tank cycles, you may need to do an emergency live-in cycling. It will be stressful for your animals, but with careful monitoring and quick interventions, you can prevent chemical burns and secondary illnesses.

Step 1: Obtain the bacteria

Ideally, you’ll want to use seeded media for this, as it truly is the quickest and safest way to get your bacteria established. If that’s not an option, I highly recommend getting your hands on a bottle of Tetra SafeStart. This is, in my experience, the fastest and safest product on the market. Unfortunately it is nearly impossible to find in Canada. I would definitely carry it in the store if I could find a supplier!

If you do manage to get your hands on a bottle of TSS, you’ll want to do a big water change, then dump the entire contents of the bottle into your tank and leave it alone for two weeks. Note that you won’t be able to use conditioner during that time, as it interferes with TSS’s mechanism, according to Tetra. You’re not supposed to do water changes either, but obviously if your animals show signs of distress, you’re allowed to bend the rules a little. Just try to keep it to a minimum (you can do spot cleanings with a turkey baster, and refill to counter evaporative loss). Aside from that, just cross your fingers and wait.

If you can’t find TSS, just use any brand of bottled nitrifying bacteria. You can still keep your animals safe — it’s just going to be more work.

Step 2: Feed the bacteria

Your animals will take care of this step for you. Moving on!

Step 3: Monitor the parameters

If you’re using Tetra SafeStart:

Every two days or so, test the water for nitrites. If you detect 2.0 ppm of nitrites or more, do a 50% water change to prevent stalling (see the troubleshooting section for details). Make sure to use dechlorinated water — remember, you’re not allowed to use conditioner!

After two weeks, test the water for ammonia, nitrites and nitrates. If you detect no ammonia or nitrites, but nitrates are 40 ppm or more, congratulations! Your aquarium is cycled. Do a final water change and you’re done.

If you’re still getting ammonia or nitrites, start doing 50% water changes and adding conditioner once a day. You will need to do this until the tank is fully cycled — yes, it’s a pain, but it’s the only way to keep your animals safe! Start monitoring your cycle as described in step 3 of the monitoring section below.

If you’re using a different product:

Start doing 50% water changes and adding conditioner once a day. You will need to do this until the tank is fully cycled — yes, it’s a pain, but it will keep your animals safe!

Follow the instructions in the monitoring section below, starting from step 1.

Monitoring the cycle

Most guides have you testing ammonia, nitrites and nitrates with liquid test kits every single day until the aquarium is fully cycled. That is a lot of work! Here is what I recommend instead:

Step 1: Ammonia

Test for ammonia once a day until you get a reading of 0.25 ppm or more. Then, move onto step 2.

Step 2: Nitrites

Test for nitrites once a day until you get a reading of 0.5 ppm or above. Then, move onto step 3.

Note: if nitrites shoot up to 2.0 ppm or above, add conditioner. This will help prevent your cycle from stalling (more details in the troubleshooting section).

If you don’t record any nitrites for two weeks, consult the troubleshooting section.

Step 3: Nitrates

Test for nitrates once a day until you get a reading of 40 ppm or above, then test ammonia and nitrites. If they are both at zero, congratulations! Your aquarium is fully cycled. Do one last water change and you will be good to go.

If you’re getting 40 ppm nitrates or more, but are still registering ammonia, consult the troubleshooting section.

If ammonia is at zero but you are still getting some nitrites, you probably just need to wait a bit longer. Give it a couple days and test again.

Cycle troubleshooting

Problem 1: You’re not getting the first ammonia spike (all parameters are at zero)

You didn’t add enough ammonia to start the cycle. Are you trying to cycle your tank with fish flakes, raw shrimp or using animals who don’t produce much waste (e.g. snails)? Don’t do that. Use one of the methods described above, you’ll have a much easier time.

Problem 2: Ammonia is not converting into nitrites (high ammonia, no nitrites, no nitrates)

You don’t have enough nitrifying bacteria in the water. Add bottled bacteria, that will kick-start the process. Make sure your filter is equipped with biological media so they will have a space to colonize, and don’t forget to keep your filter running at all times.

Problem 3: Your cycle is stalled at the nitrite stage (little to no ammonia, high nitrites, no nitrates)

Your nitrites are too high. To avoid a bacterial die-off, you should be keeping the levels below 4 ppm. You can control the amount of nitrites by doing water changes (don’t forget to add conditioner!) A 50% water change will cut the amount of nitrites by half. If that’s still too high, do another 50% water change to cut that amount by half again. Don’t just change all the water at once, though — you want to keep some nitrites in the tank so that your nitrobacters don’t starve.

If you worry about water changes removing too much ammonia from your tank, you can use Seachem Prime to neutralize the excess nitrites instead. One dose will neutralize 0.5 ppm of nitrites for 24 hours. You can safely use up to 4 doses, even if there are live animals in the tank. Try to keep some nitrites for your nitrobacters to munch on, though! You don’t need to neutralize all of it, just enough so that it doesn’t reach 4 ppm. I recommend trying to stay below 2 ppm, just to be safe.

Problem 4: The cycle never seems to end (low ammonia, low nitrites, high nitrates)

You don’t have enough filtration capacity for the amount of ammonia that is being produced in your tank. Perhaps you are overstocking, are not using enough biological media, or your filter is inadequate.

Problem 5: Your cycle suddenly crashed (high ammonia, little to no nitrites, low to high nitrates)

Something killed off your nitrifying bacteria. Maybe your filter stopped running for too long (e.g. during a power outage). Maybe you forgot to dechlorinate the water. Maybe you treated your tank with an antibiotic. Whatever it is, you will need to restart the cycling process. If you’re lucky, some of the bacteria survived the ordeal. Follow the steps for live-in cycling and hope for a quick recovery!